


Customer Photos - Asgard Bike Storage
Thanks to all of our customers for sending in pictures of their Asgard bike sheds in use, Take a look below at some fantastic customer photographs and reviews of our Bike Storage ranges. Please keep those images and reviews coming, we read and publish every one.
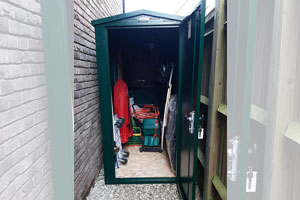
Helen Gyselynck
I'm the proud owner of a Sentry shed. Squeezed in down the side of my house. My thanks to my son who spent the afternoon fitting about 225 screws!.
Helen Gyselynck
I'm the proud owner of a Sentry shed. Squeezed in down the side of my house. My thanks to my son who spent the afternoon fitting about 225 screws!.

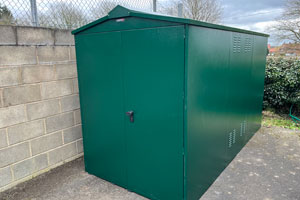
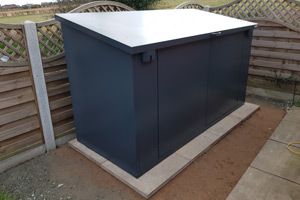
Gordon
I am involved with our local sports / playing field and we were getting short of storage space. Chose this unit because it was the perfect size for what we needed and, more importantly, gave us the security required for a remote location.
Gordon
I am involved with our local sports / playing field and we were getting short of storage space. Chose this unit because it was the perfect size for what we needed and, more importantly, gave us the security required for a remote location.

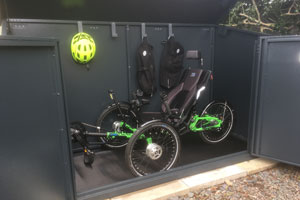
William
Perfect size for storing my recumbent trike, with its extra width requirement. Well-engineered product and easy to assemble.
William
Perfect size for storing my recumbent trike, with its extra width requirement. Well-engineered product and easy to assemble.

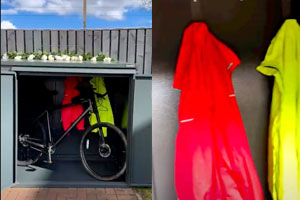
Sam's Pretty Little Home
First time opened in a few months, bone dry just a bit of dust and a few tiny dried out worms if your looking for bike storage then this is the one,, I’m also made up with my new hooks both bought from @asgardstorage .. it’s only taken 4 months for them to go up! Also my reel was spoilt by Shauns foot, which he thought was amusing! How annoying! Happy Saturday, going on a bike ride today, wish me luck it’s been a while, xx

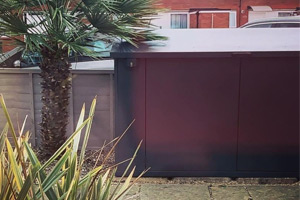
Casa
asgardstorage thank you!! We’re big fans of the shed, it’s great! A lot of passersby ask us where it’s from
Casa
asgardstorage thank you!! We’re big fans of the shed, it’s great! A lot of passersby ask us where it’s from

Adrian
Like the majority of other review(er)s, I am indeed delighted with my new cycle store and, would similarly echo many of the comments made about product quality and the importance of a good level base. I also thought I'd share a couple of observations (insights perhpas) from the self-build installation process in the hope these may be of interest to others.
My experience would lead me to suggest its probably best not to fully tighten any of the fixings, initially. Maybe slightly more than hand tight - enough to just retain in build position. This is because (thankfully) the majority of fixing points have slotted holes in at least one direction, presumably to compensate for differences & discrepancies in bases and positioning accuracy (every one will be slightly different). This approach allows a little bit of wriggle room during the build to get the best / optimal alignment all round between all components, before a completing a full and final tighten to all fixings toward or at the very end of installation. I discovered this after initially fully tightening the first couple or (rear) panels and then realising that the corners needed some adjustment to sit most tightly together.
A little 'fix' I deployed (and found really helpful) when fixing the roof hinges, was to apply a short strip of sticky tape over the bolt heads when inserted in the outer plates (see pic.) as this allowed me to insert them in 'sets' together externally, and it also made it much easier when placing the inner plates and captive nuts on the inside, without pushing the bolts back through the holes. (Remove the tape when done).
When fixing the doors (hinges) to the main store, I used pieces of wood to support the doors at the right height while inserting and tightening the hinge screws. Do not over-tighten - the screws are stainless steel, not hardened steel and could be susceptible to damage.
Make sure the screws used to fasten the lid handle are tightly fitted but not too tight before pressing in the plastic concealment flaps as I cant see how you'd be able to access these again should they ever work loose?
Having spent a good deal of time laying and preparing my base with HD concrete slabs on sand on compacted hardcore - along with many progress and finishing checks with a long spirit level in all directions, I was still rather suprised that I still needed to resort to using the (supplied) levelling shims to get the doors properly aligned (an even meeting gap). However, they are fairly easy to insert (I used a very large flat head screw drive to gently lever / raise the unit locally) and push them under the front corner and just out of sight.
The only downside on the products supplied (for me) was that I didnt find the 'self-cutting' anchor bolts very good or easy to use, even after particular taking care to drill vertically with the correct sized masony bit into my concrete (slab) base. Having tried two of them without getting either to stay vertical or to fully sink (maybe my drill was not powerful enough), I resorted to extracting them, and instead, inserting HD plastic plugs and large (conventional) SS screws with washers under the heads. Its certainly held very solidly in position and was very straightforward to execute.
I bought a 'bundle' Access Plus store with the need to store three bikes plus kit. With this came the locks - really easy to use - two shelves really easy to make and fit, some handy hooks and a sturdy timber floor. However, after doing my final measurements of bikes prior to installation (but after taking delivery) and in reading the small print, I discovered and learned that by inserting the timber floor one loses 65mm of internal height. In the end, I decided not to install the timber floor as I couldnt readily accommodate my large framed 29er with bull-horn bar-ends with the floor in place... so this is an expensive 'spare' at the moment..... Probably my fault but do measure your bikes carefully and consider how they will all fit before ordering. Best to go large!!
Finally - (and to finish where I started) the product overall is well made and pretty easy to install and (in my view) 'looks the business' and feels reassuringly solid and very secure. I have still taken to locking my bikes together with a ground anchor chain as well but its a case of 'once bitten' etc...
In short : Thoroughly (and without hesitation) would recommend this as an excellent secure cycle store solution.
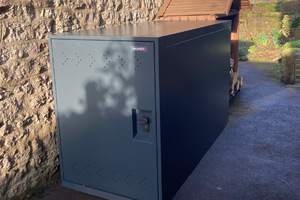
Peter
Phew! No more carrying bikes up from the cellar @AsgardStorage
Peter
Phew! No more carrying bikes up from the cellar @AsgardStorage

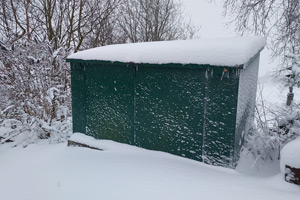
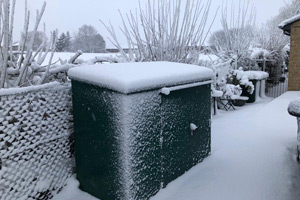
Dry Biker
Picture as promised. We are just heading out for our snow ride into the moors. I can confirm all dry and correct inside the Asgard bike shed
Dry Biker
Picture as promised. We are just heading out for our snow ride into the moors. I can confirm all dry and correct inside the Asgard bike shed
Chris
Andy. Great tip from last year. After moving the shed away from the trees, you were correct I would say there was the slightest hint this morning of dampness, but hardly anything at all. Compared to last year that is amazing. It's all down to leaving a gap for the vents.
Chris
Andy. Great tip from last year. After moving the shed away from the trees, you were correct I would say there was the slightest hint this morning of dampness, but hardly anything at all. Compared to last year that is amazing. It's all down to leaving a gap for the vents.
Neil
This is my bike storage now over 10 years old , paint slightly discoloured but locks and door hinges perfect . Best money spent for secure place for the bikes.
Neil
This is my bike storage now over 10 years old , paint slightly discoloured but locks and door hinges perfect . Best money spent for secure place for the bikes.